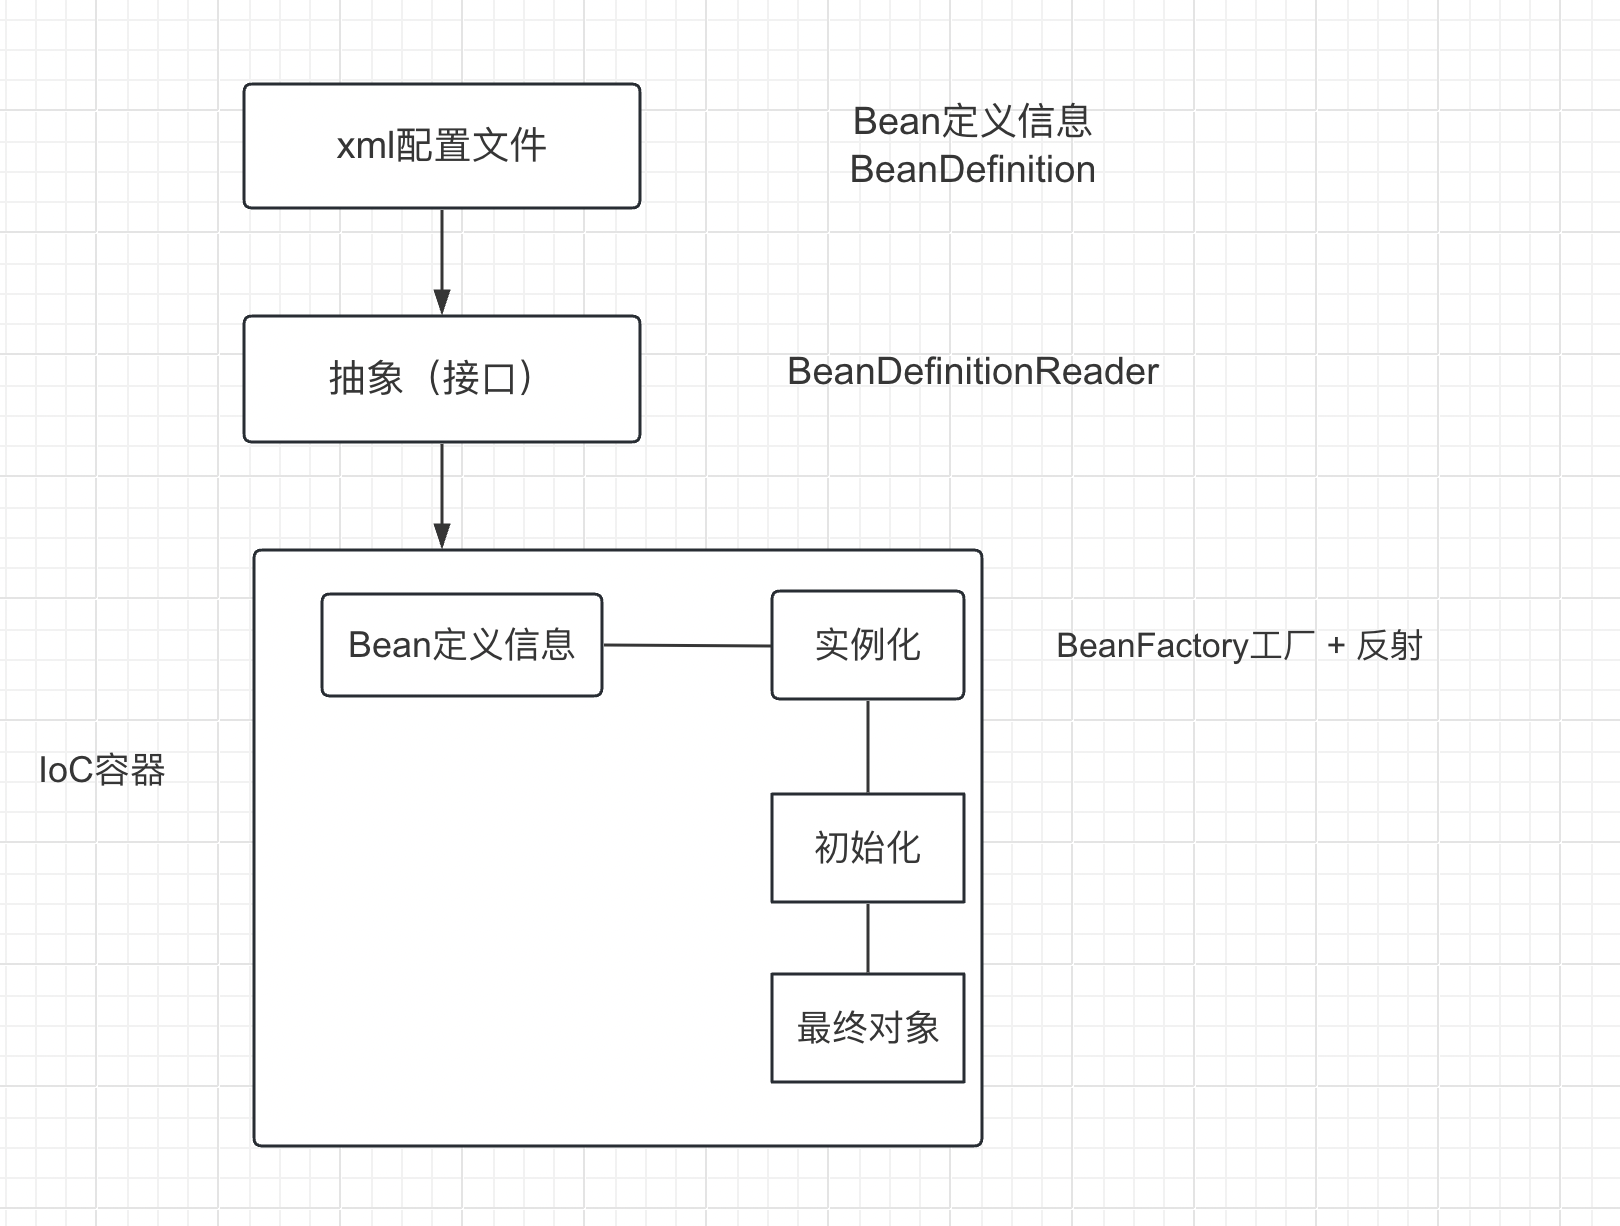
Spring学习part02 控制反转 IoC Spring中通过IoC容器来管理所有Java对象的实例化和初始化,控制对象与对象之间的依赖关系。我们将由IoC容器管理的Java对象成为Spring Bean,与Java使用关键字new创建的Java对象没有任何区别。
IoC容器是Spring框架中最重要的核心组件之一,它贯穿了Spring从诞生到成长的整个过程。
控制反转是一种思想
控制反转是为了降低程序耦合度,提高程序扩展能力
控制反转,反转的是什么?
将对象的创建权力交出去,交给第三方容器负责
将对象和对象之间关系的维护权交出去,交给第三方容器负责
控制反转这种思想如何实现
DI(Dependency injection):依赖注入
依赖注入介绍 指Spring创建对象过程中,将的对象依赖属性通过配置进行注入
依赖注入常见的实现方式包括两种:
Bean管理:Bean对象的创建,以及Bean对象中属性的赋值(或者叫做Bean对象之间关系的维护)
基于XML管理bean 新建子模块spring6-iocxml
获取bean的三种方式 方式一:根据id获取 方式二:根据类型获取 当根据类型获取bean时,要求IoC容器中制定类型的bean有且只能有一个
若IoC容器中一共配置了两个,例如:
1 2 3 <bean class ="org.example.spring6.iocxml.User" id ="user" /> <bean class ="org.example.spring6.iocxml.User" id ="user2" />
1
2
User user2 = context.getBean(User.class);"根据类型获取bean: " + user2);
错误信息如下
1
2
org.springframework.beans.factory.NoUniqueBeanDefinitionException: No qualifying bean of type 'org.example.spring6.iocxml.User' available: expected single matching bean but found 2 : user ,user2
如果一个接口有多个实现类,这些实现类都配置了bean,根据接口类型可以获取bean吗
不可以,因为bean不唯一
1 2 3 <bean id ="userDao" class ="org.example.spring6.iocxml.bean.UserDaoImpl" /> <bean id ="personDao" class ="org.example.spring6.iocxml.bean.PersonDaoImpl" />
1 2 3 4 5 6 7 8 9 10 11 12 13 14 15 16 package org.example.spring6.iocxml.bean;public class PersonDaoImpl implements UserDao {@Override public void run () {"Person......" );
1 2 3 4 5 6 7 8 9 @Test public void testUserDao () {ApplicationContext context = new ClassPathXmlApplicationContext ("beans.xml" );UserDao userDao = context.getBean(UserDao.class);
错误信息
1 2 org.springframework .beans .factory .NoUniqueBeanDefinitionException : No qualifying bean of type 'org.example.spring6.iocxml.bean.UserDao' available: expected single matching bean but found 2 : userDao,personDao
方式三:根据id和类型获取 1 2 3 4 5 6 7 8 9 10 11 12 13 14 15 16 @Test public void testUser () {ApplicationContext context = new ClassPathXmlApplicationContext ("beans.xml" );User user1 = (User) context.getBean("user" );"根据id获取bean: " + user1);User user2 = context.getBean(User.class);"根据类型获取bean: " + user2);User user3 = context.getBean("user" , User.class);"根据id和类型获取bean: " + user3);
依赖注入 依赖注入之setter注入
创建类,定义属性,生成属性的set方法
在spring配置文件中配置
新建Book类,并且实现getter,setter,有参和无参构造函数
1 2 3 4 5 6 7 8 9 10 11 12 13 14 15 16 17 18 19 20 21 22 23 24 25 26 27 28 29 30 31 32 33 34 35 36 37 38 39 40 41 42 43 44 45 46 package org.example.spring6.iocxml.di;public class Book {private String bookName;private String author;public Book () {public Book (String bookName, String author) {this .bookName = bookName;this .author = author;public String getBookName () {return bookName;public void setBookName (String bookName) {this .bookName = bookName;public String getAuthor () {return author;public void setAuthor (String author) {this .author = author;@Override public String toString () {return "Book{" +"bookName='" + bookName + '\'' +", author='" + author + '\'' +'}' ;
新建配置文件(为区分刚刚的配置文件)bean-di.xml
1 2 3 4 5 6 7 8 9 10 11 <?xml version="1.0" encoding="UTF-8" ?> <beans xmlns ="http://www.springframework.org/schema/beans" xmlns:xsi ="http://www.w3.org/2001/XMLSchema-instance" xsi:schemaLocation ="http://www.springframework.org/schema/beans http://www.springframework.org/schema/beans/spring-beans.xsd" > <bean class ="org.example.spring6.iocxml.di.Book" id ="book" > <property name ="bookName" value ="HTML" /> <property name ="author" value ="wangwu" /> </bean > </beans >
在测试类进行测试
1 2 3 4 5 6 @Test public void testSetter () {ApplicationContext context = new ClassPathXmlApplicationContext ("bean-di.xml" );Book book = context.getBean("book" , Book.class);
依赖注入之构造器注入
创建类,定义属性,生成有参数的构造方法
在spring配置文件配置
Book类同上,但是构造函数做简单修改
1 2 3 4 5 6 7 8 public Book () {"无参构造已经被执行" );public Book (String bookName, String author) {this .bookName = bookName;this .author = author;"有参构造已经被执行" );
1 2 3 4 5 6 7 8 9 10 11 <bean class ="org.example.spring6.iocxml.di.Book" id ="book" > <property name ="bookName" value ="HTML" /> <property name ="author" value ="wangwu" /> </bean > <bean class ="org.example.spring6.iocxml.di.Book" id ="bookConstructor" > <constructor-arg name ="bookName" value ="PHP" /> <constructor-arg name ="author" value ="AAAAA" /> </bean >
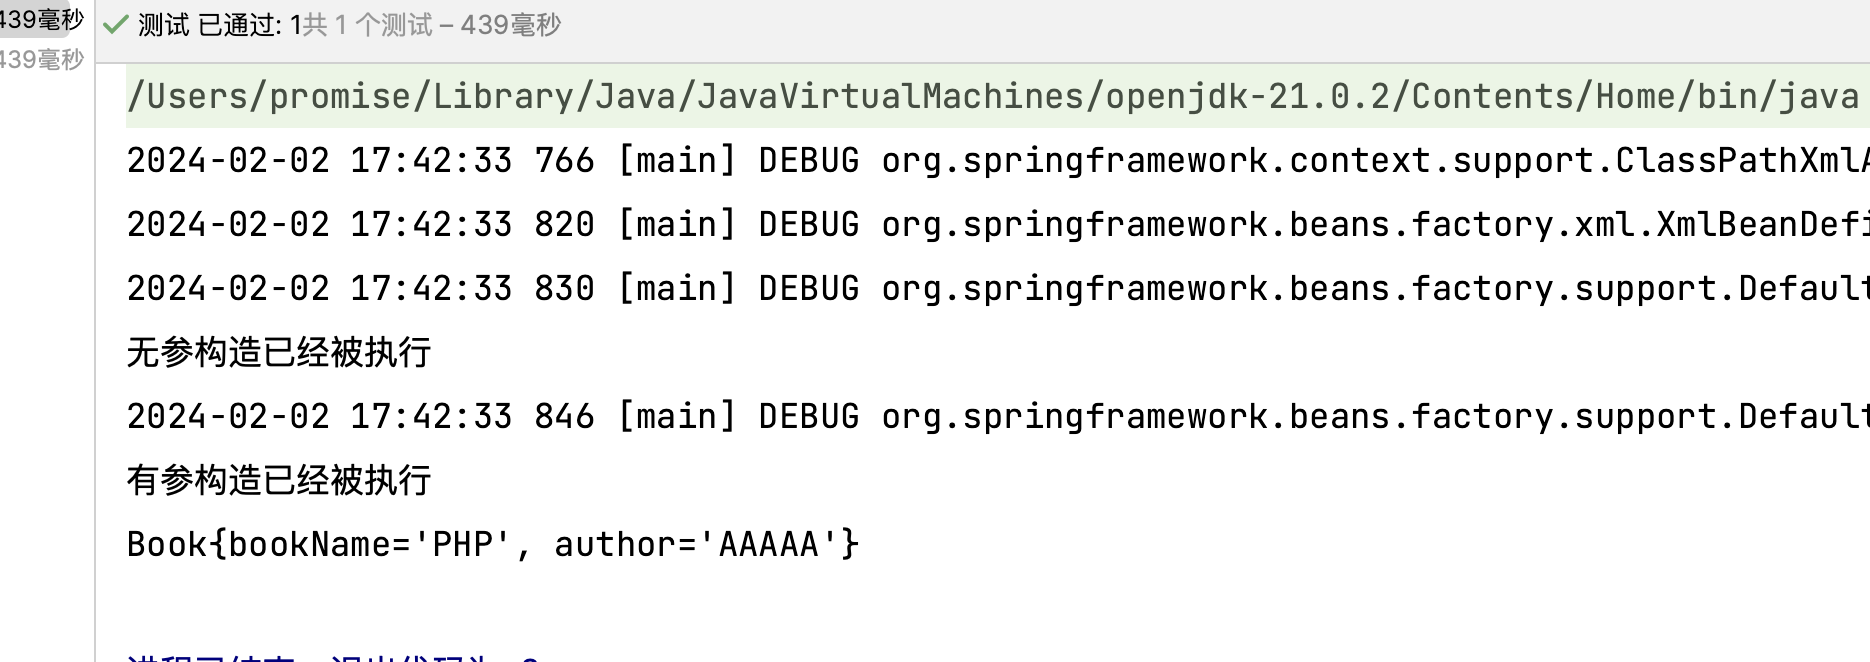
测试类
1 2 3 4 5 6 @Test public void testConstructor () {ApplicationContext context = new ClassPathXmlApplicationContext ("bean-di.xml" );Book book = context.getBean("bookConstructor" , Book.class);
执行结果
- 为什么有一句无参构造已经被执行 ?
- 因为xml文件中“通过set方法注入”里面的内容也被执行,这里运行的是无参构造函数
特殊值处理
字面量赋值
常规写法
null值
若为空值,需要使用额外的标签
1 2 3 <property name ="bookName" > <null /> </property >
xml实体
插入的值为xml格式
解决方法1:转义
1 2 <property name ="bookName" value ="< > " > </property >
CDATA节(区),可以表示特殊符号
1 2 3 4 <property name ="bookName" > <value > <![CDATA[a < b]]></value > </property >
特殊类型属性注入 外部引入bean 新建两个类,部门和员工(一对多关系),
1 2 3 4 5 6 7 8 9 10 11 12 13 14 15 16 17 18 19 20 21 22 23 24 public class Department {private String dName;public String getdName () {return dName;public void setdName (String dName) {this .dName = dName;public Department () {public Department (String dName) {this .dName = dName;public void info () {"部门名称: " + dName);
1 2 3 4 5 6 7 8 9 10 11 12 13 14 15 16 17 18 19 20 21 22 23 24 25 26 27 28 29 30 31 32 33 34 35 36 37 38 39 40 41 42 43 44 45 46 47 48 49 50 public class Employee {private String eName;private Integer age;private Department department;public String geteName () {return eName;public void seteName (String eName) {this .eName = eName;public Integer getAge () {return age;public void setAge (Integer age) {this .age = age;public Department getDepartment () {return department;public void setDepartment (Department department) {this .department = department;public Employee () {public Employee (String eName, Integer age, Department department) {this .eName = eName;this .age = age;this .department = department;public void work () {"员工在工作, 工龄为: " + age);
1 2 3 4 5 6 7 8 9 10 11 12 13 14 15 16 17 18 19 20 21 22 23 <?xml version="1.0" encoding="UTF-8" ?> <beans xmlns ="http://www.springframework.org/schema/beans" xmlns:xsi ="http://www.w3.org/2001/XMLSchema-instance" xsi:schemaLocation ="http://www.springframework.org/schema/beans http://www.springframework.org/schema/beans/spring-beans.xsd" > <bean class ="org.example.spring6.iocxml.ditest.Department" id ="department" > <property name ="dName" value ="安保部" /> </bean > <bean class ="org.example.spring6.iocxml.ditest.Employee" id ="employee" > <property name ="eName" value ="lucy" /> <property name ="age" value ="50" /> <property name ="department" ref ="department" /> </bean > </beans >
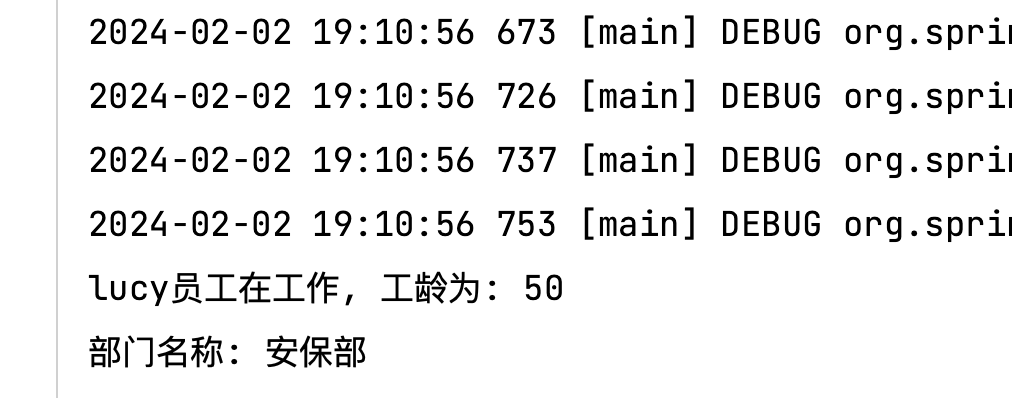
新建测试用例
1 2 3 4 5 6 7 @Test public void testEmployee () {ApplicationContext context = new ClassPathXmlApplicationContext ("bean-di-test.xml" );Employee employee = context.getBean("employee" , Employee.class);
输出结果
内部引入bean 1 2 3 4 5 6 7 8 9 10 <bean class ="org.example.spring6.iocxml.ditest.Employee" id ="employee2" > <property name ="eName" value ="mary" /> <property name ="age" value ="30" /> <property name ="department" > <bean class ="org.example.spring6.iocxml.ditest.Department" > <property name ="dName" value ="财务部" /> </bean > </property > </bean >
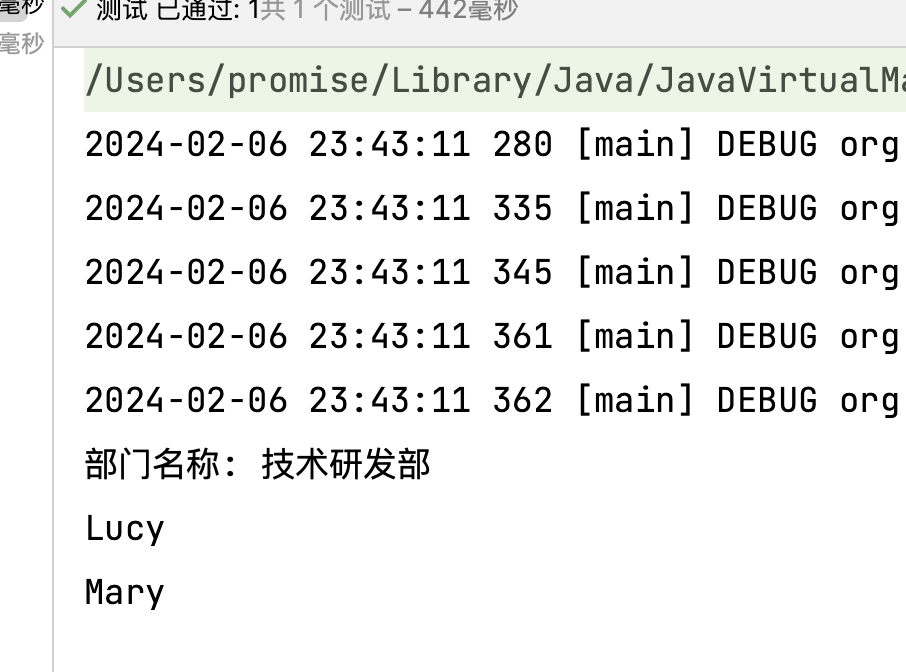
级联引入bean 1 2 3 4 5 6 7 8 9 10 11 12 13 14 15 16 <bean id ="employee3" class ="org.example.spring6.iocxml.ditest.Employee" > <property name ="eName" value ="tom" /> <property name ="age" value ="30" /> <property name ="department" ref ="department3" /> <property name ="department.dName" value ="测试部" /> </bean > <bean id ="department3" class ="org.example.spring6.iocxml.ditest.Department" > <property name ="dName" value ="技术研发部" /> </bean >
为数组类型属性赋值 员工类添加爱好,并生成getter(), setter()
1 2 3 4 5 6 7 8 9 private String[] hobbies;public String[] getHobbies() {return hobbies;public void setHobbies (String[] hobbies) {this .hobbies = hobbies;
构造bean,新建bean-di-array.xml
1 2 3 4 5 6 7 8 9 10 11 12 13 14 15 16 17 18 19 20 21 22 23 24 25 26 <?xml version="1.0" encoding="UTF-8" ?> <beans xmlns ="http://www.springframework.org/schema/beans" xmlns:xsi ="http://www.w3.org/2001/XMLSchema-instance" xsi:schemaLocation ="http://www.springframework.org/schema/beans http://www.springframework.org/schema/beans/spring-beans.xsd" > <bean class ="org.example.spring6.iocxml.ditest.Department" id ="department" > <property name ="dName" value ="技术部" /> </bean > <bean class ="org.example.spring6.iocxml.ditest.Employee" id ="employee" > <property name ="eName" value ="Lucy" /> <property name ="age" value ="20" /> <property name ="department" ref ="department" /> <property name ="hobbies" > <array > <value > 唱</value > <value > 跳</value > <value > rap</value > <value > 篮球</value > </array > </property > </bean > </beans >
如果为数组类型,在property标签中还有array标签写入,再使用value标签添加值。
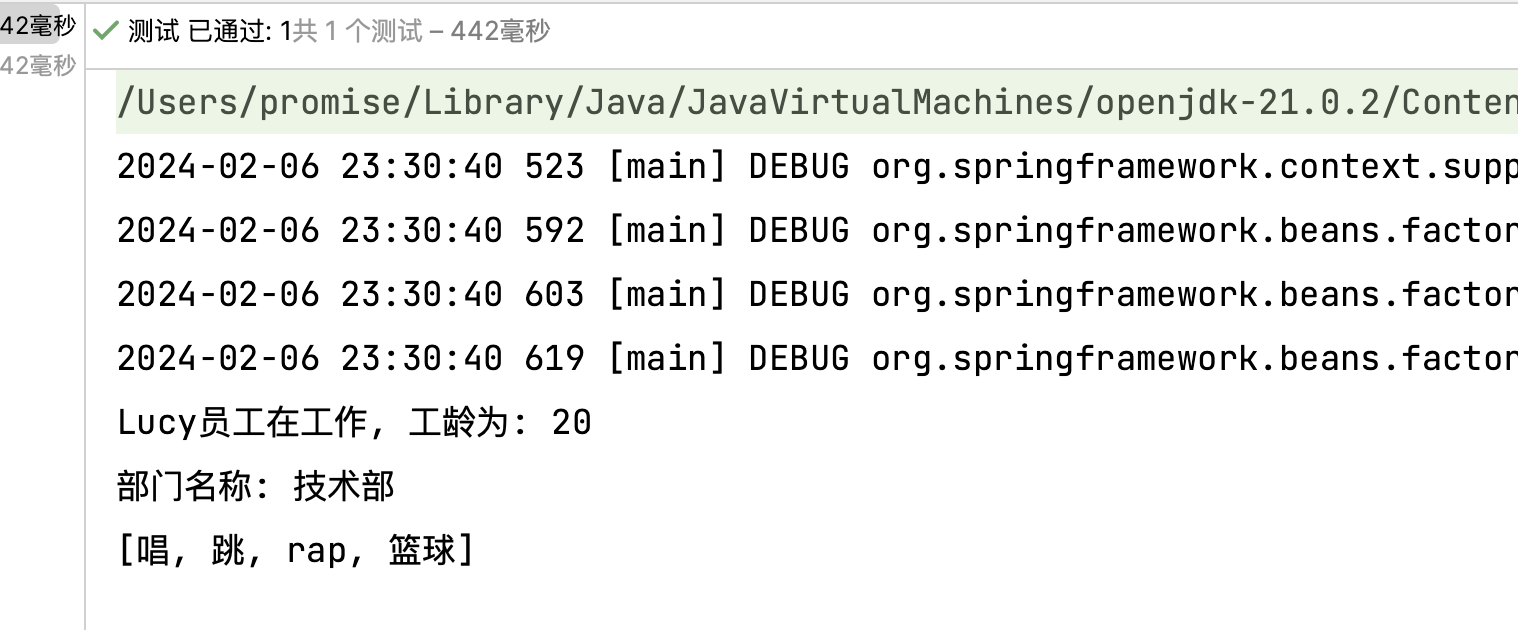
编写测试类
1
2
3
4
5
6
@Test public void testArray () {ApplicationContext context = new ClassPathXmlApplicationContext ("bean-di-array.xml" );Employee employee = context.getBean("employee" , Employee.class);
为集合类型属性注入 list集合类型 部门新增属性,员工列表,并生成getter(), setter()
1 2 3 4 5 6 7 8 9 10 11 12 13 14 15 16 private List<Employee> employeeList;public List<Employee> getEmployeeList () {return employeeList;public void setEmployeeList (List<Employee> employeeList) {this .employeeList = employeeList;public void info () {"部门名称: " + dName);for (Employee emp : employeeList) {
配置bean,bean-di-list.xml
1 2 3 4 5 6 7 8 9 10 11 12 13 14 15 16 17 18 19 20 21 22 23 24 <?xml version="1.0" encoding="UTF-8" ?> <beans xmlns ="http://www.springframework.org/schema/beans" xmlns:xsi ="http://www.w3.org/2001/XMLSchema-instance" xsi:schemaLocation ="http://www.springframework.org/schema/beans http://www.springframework.org/schema/beans/spring-beans.xsd" > <bean class ="org.example.spring6.iocxml.ditest.Employee" id ="employee1" > <property name ="eName" value ="Lucy" /> <property name ="age" value ="20" /> </bean > <bean class ="org.example.spring6.iocxml.ditest.Employee" id ="employee2" > <property name ="eName" value ="Mary" /> <property name ="age" value ="30" /> </bean > <bean class ="org.example.spring6.iocxml.ditest.Department" id ="department" > <property name ="dName" value ="技术研发部" /> <property name ="employeeList" > <list > <ref bean ="employee1" /> <ref bean ="employee2" /> </list > </property > </bean > </beans >
编写测试类
1 2 3 4 5 6 @Test public void testList () {ApplicationContext context = new ClassPathXmlApplicationContext ("bean-di-list.xml" );Department department = context.getBean("department" , Department.class);
map集合类型 新建学生类
1 2 3 4 5 6 7 8 9 10 11 12 13 14 15 16 17 18 19 20 21 22 23 24 25 26 27 28 29 30 31 32 33 34 35 36 37 38 39 40 41 42 43 44 45 46 47 48 49 50 51 52 53 54 55 package org.example.spring6.iocxml.dimap;import java.util.Map;public class Student {private String studentId;private String studentName;private Map<String, Teacher> teacherMap;public String getStudentId () {return studentId;public void setStudentId (String studentId) {this .studentId = studentId;public String getStudentName () {return studentName;public void setStudentName (String studentName) {this .studentName = studentName;public Map<String, Teacher> getTeacherMap () {return teacherMap;public void setTeacherMap (Map<String, Teacher> teacherMap) {this .teacherMap = teacherMap;public void run () {"学生编号: " + studentId + "学生名: " + studentName);@Override public String toString () {return "Student{" +"studentId='" + studentId + '\'' +", studentName='" + studentName + '\'' +", teacherMap=" + teacherMap +'}' ;
新建教师类
1 2 3 4 5 6 7 8 9 10 11 12 13 14 15 16 17 18 19 20 21 22 23 24 25 26 27 28 29 30 31 32 33 34 35 36 37 package org.example.spring6.iocxml.dimap;public class Teacher {private String teacherId;private String teacherName;public String getTeacherId () {return teacherId;public void setTeacherId (String teacherId) {this .teacherId = teacherId;public String getTeacherName () {return teacherName;public void setTeacherName (String teacherName) {this .teacherName = teacherName;@Override public String toString () {return "Teacher{" +"teacherId='" + teacherId + '\'' +", teacherName='" + teacherName + '\'' +'}' ;
配置bean,bean-di-map.xml
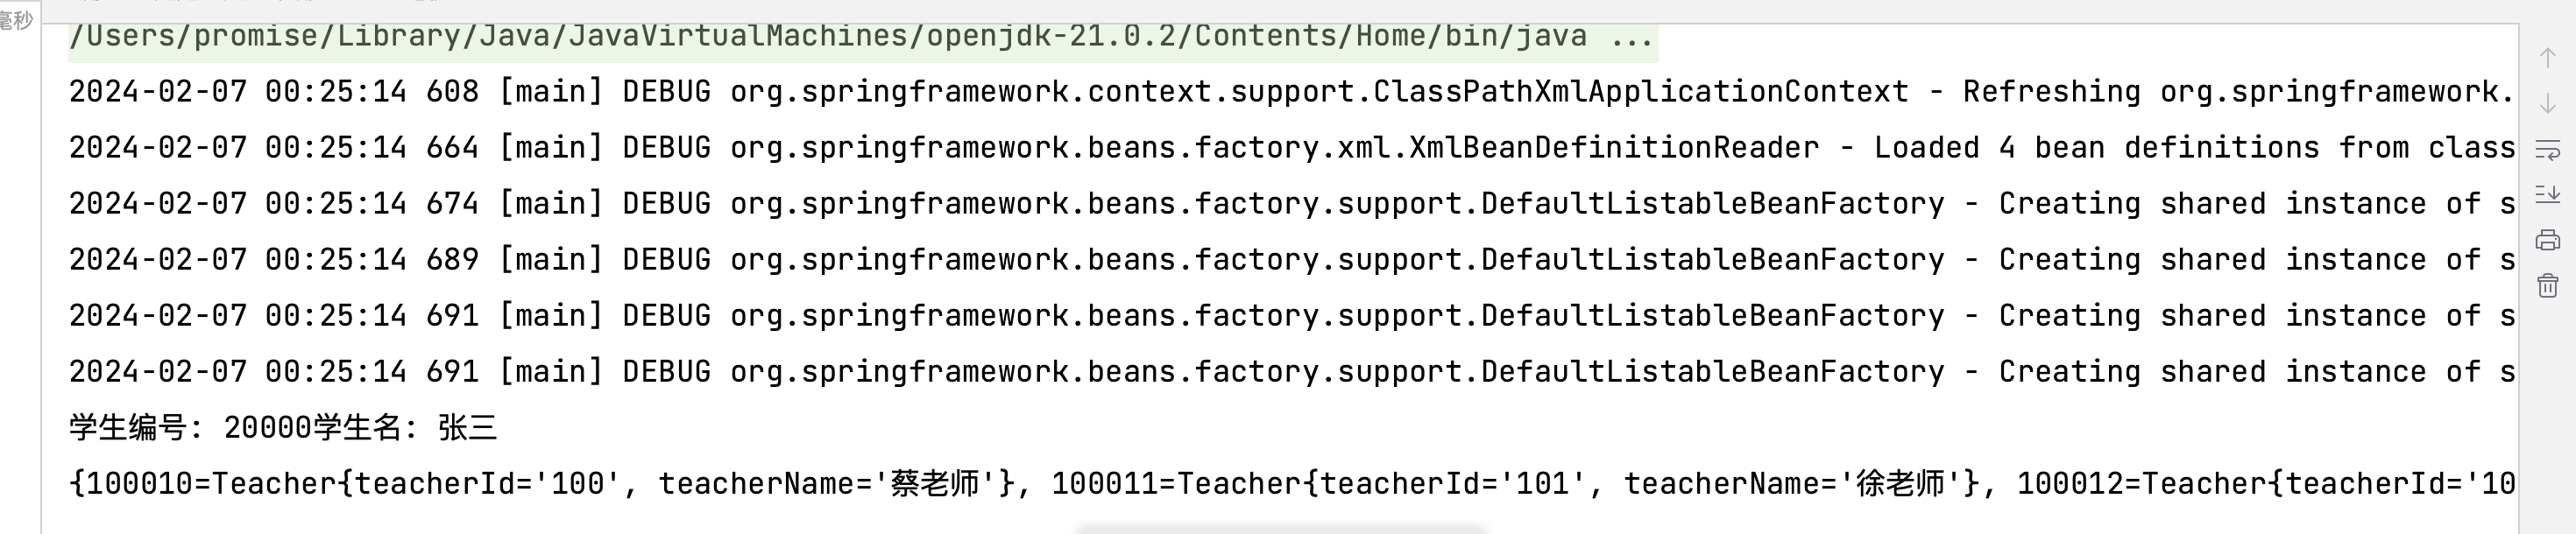
1 2 3 4 5 6 7 8 9 10 11 12 13 14 15 16 17 18 19 20 21 22 23 24 25 26 27 28 29 30 31 32 33 34 <?xml version="1.0" encoding="UTF-8" ?> <beans xmlns ="http://www.springframework.org/schema/beans" xmlns:xsi ="http://www.w3.org/2001/XMLSchema-instance" xsi:schemaLocation ="http://www.springframework.org/schema/beans http://www.springframework.org/schema/beans/spring-beans.xsd" > <bean class ="org.example.spring6.iocxml.dimap.Student" id ="student" > <property name ="studentId" value ="20000" /> <property name ="studentName" value ="张三" /> <property name ="teacherMap" > <map > <entry key ="100010" value-ref ="teacher1" /> <entry key ="100011" value-ref ="teacher2" /> <entry key ="100012" value-ref ="teacher3" /> </map > </property > </bean > <bean class ="org.example.spring6.iocxml.dimap.Teacher" id ="teacher1" > <property name ="teacherId" value ="100" /> <property name ="teacherName" value ="蔡老师" /> </bean > <bean class ="org.example.spring6.iocxml.dimap.Teacher" id ="teacher2" > <property name ="teacherId" value ="101" /> <property name ="teacherName" value ="徐老师" /> </bean > <bean class ="org.example.spring6.iocxml.dimap.Teacher" id ="teacher3" > <property name ="teacherId" value ="102" /> <property name ="teacherName" value ="kun老师" /> </bean > </beans >
编写测试类
1 2 3 4 5 6 @Test public void testMap () {ApplicationContext context = new ClassPathXmlApplicationContext ("bean-di-map.xml" );Student student = context.getBean("student" , Student.class);
引用集合类型的bean 新增课程类Lesson
1 2 3 4 5 6 7 8 9 10 11 12 13 14 15 16 17 18 19 20 21 22 23 24 25 26 27 package org.example.spring6.iocxml.dimap;public class Lesson {private String lessonName;public String getLessonName () {return lessonName;public void setLessonName (String lessonName) {this .lessonName = lessonName;@Override public String toString () {return "Lesson{" +"lessonName='" + lessonName + '\'' +'}' ;
新增学生属性:lessonList,表示学生选了哪些课程,并生成getter(), setter()
1 2 3 4 5 6 7 8 9 private List<Lesson> lessonList;public List<Lesson> getLessonList () {return lessonList;public void setLessonList (List<Lesson> lessonList) {this .lessonList = lessonList;
配置bean,bean-di-ref.xml
需要引入新的约束
xmlns:util="http://www.springframework.org/schema/util"
xsi:schemaLocation中添加
http://www.springframework.org/schema/utilhttp://www.springframework.org/schema/util/spring-util.xsd
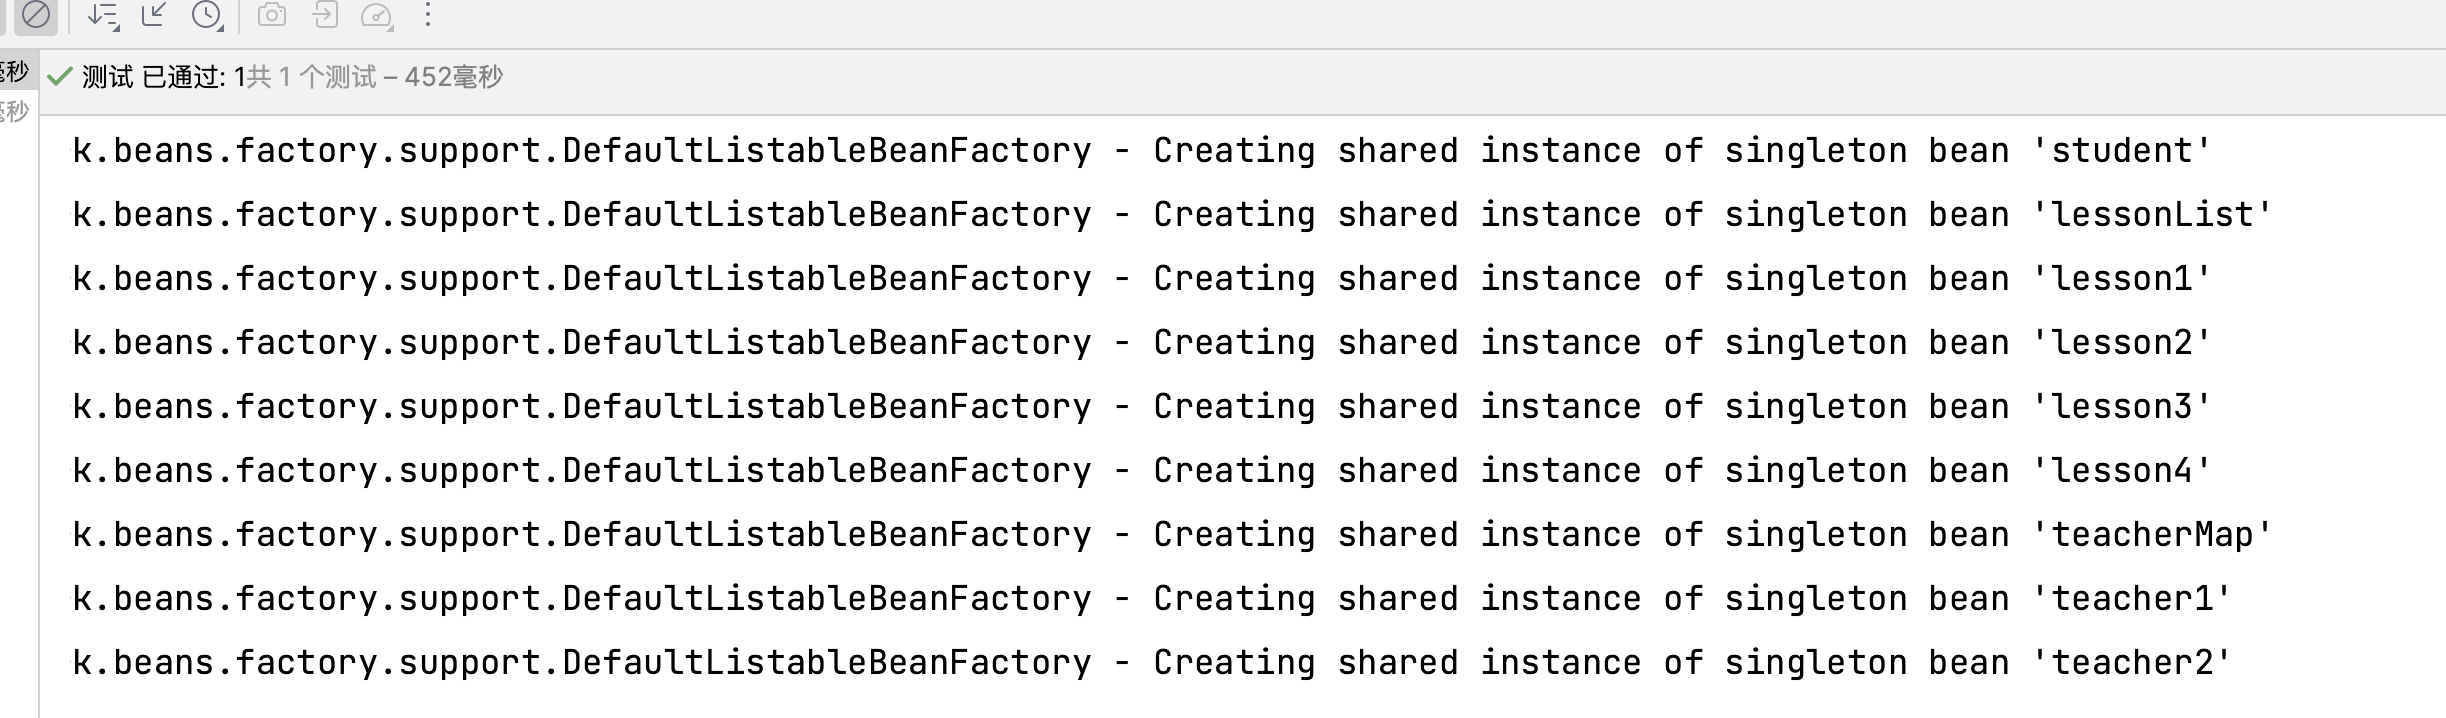
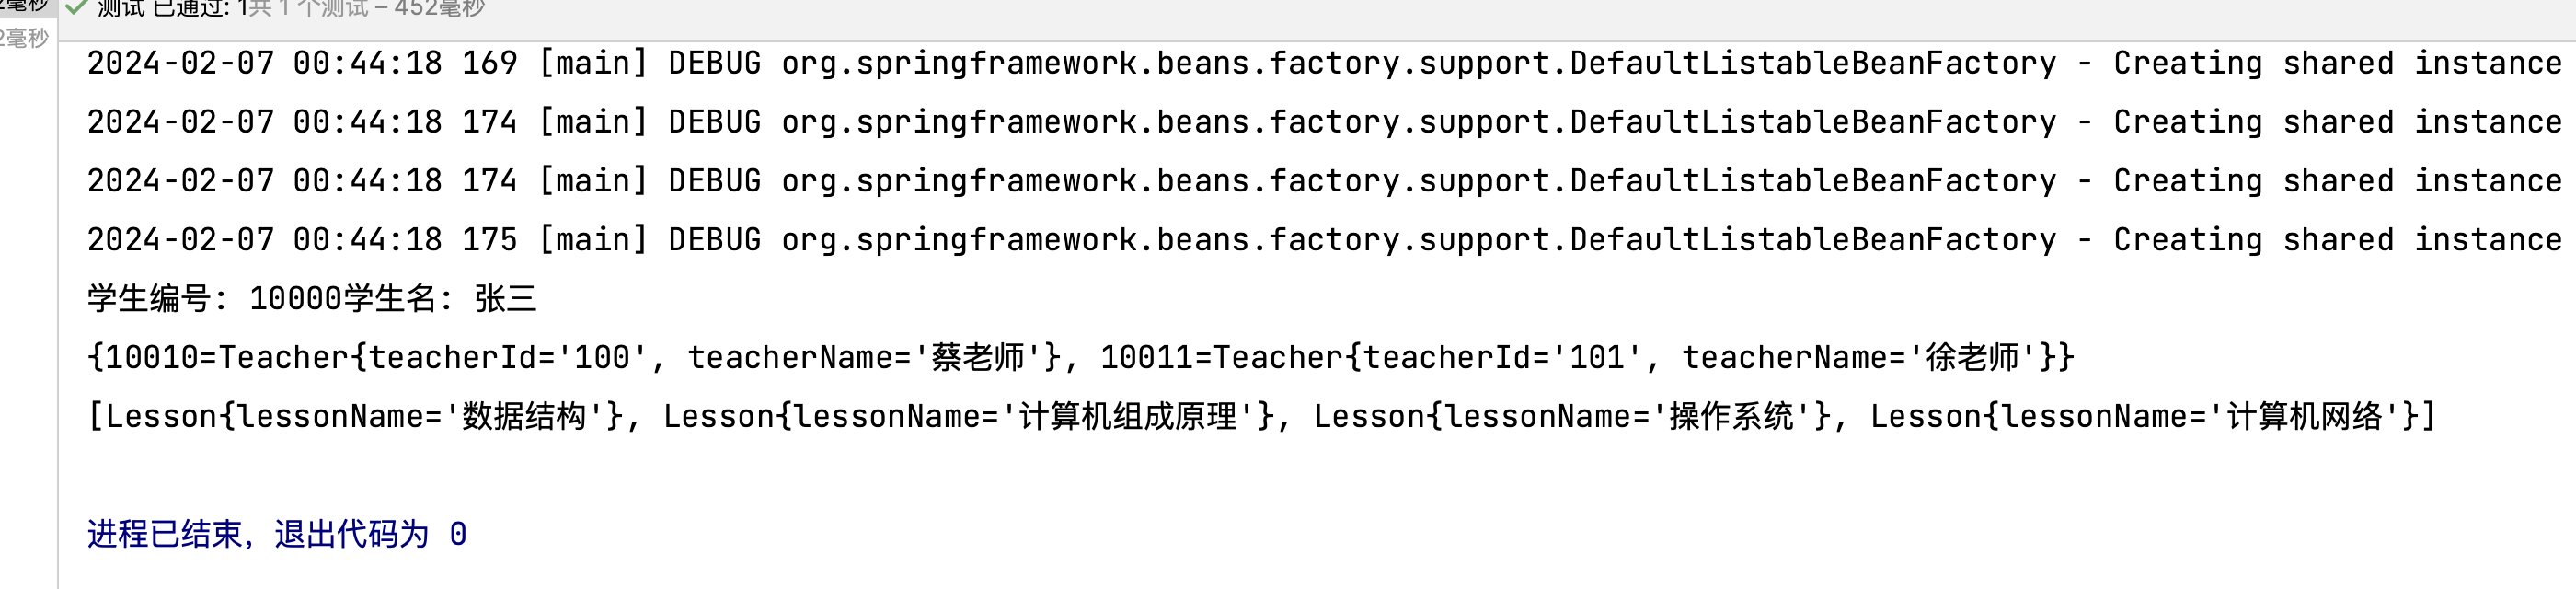
1 2 3 4 5 6 7 8 9 10 11 12 13 14 15 16 17 18 19 20 21 22 23 24 25 26 27 28 29 30 31 32 33 34 35 36 37 38 39 40 41 42 43 44 45 46 47 48 49 50 51 52 53 54 <?xml version="1.0" encoding="UTF-8" ?> <beans xmlns ="http://www.springframework.org/schema/beans" xmlns:xsi ="http://www.w3.org/2001/XMLSchema-instance" xmlns:util ="http://www.springframework.org/schema/util" xsi:schemaLocation ="http://www.springframework.org/schema/beans http://www.springframework.org/schema/beans/spring-beans.xsd http://www.springframework.org/schema/util http://www.springframework.org/schema/util/spring-util.xsd" ><bean class ="org.example.spring6.iocxml.dimap.Student" id ="student" > <property name ="studentId" value ="10000" /> <property name ="studentName" value ="张三" /> <property name ="lessonList" ref ="lessonList" /> <property name ="teacherMap" ref ="teacherMap" /> </bean > <bean class ="org.example.spring6.iocxml.dimap.Teacher" id ="teacher1" > <property name ="teacherName" value ="蔡老师" /> <property name ="teacherId" value ="100" /> </bean > <bean class ="org.example.spring6.iocxml.dimap.Teacher" id ="teacher2" > <property name ="teacherName" value ="徐老师" /> <property name ="teacherId" value ="101" /> </bean > <bean class ="org.example.spring6.iocxml.dimap.Lesson" id ="lesson1" > <property name ="lessonName" value ="数据结构" /> </bean > <bean class ="org.example.spring6.iocxml.dimap.Lesson" id ="lesson2" > <property name ="lessonName" value ="计算机组成原理" /> </bean > <bean class ="org.example.spring6.iocxml.dimap.Lesson" id ="lesson3" > <property name ="lessonName" value ="操作系统" /> </bean > <bean class ="org.example.spring6.iocxml.dimap.Lesson" id ="lesson4" > <property name ="lessonName" value ="计算机网络" /> </bean > <util:list id ="lessonList" > <ref bean ="lesson1" /> <ref bean ="lesson2" /> <ref bean ="lesson3" /> <ref bean ="lesson4" /> </util:list > <util:map id ="teacherMap" > <entry key ="10010" value-ref ="teacher1" /> <entry key ="10011" value-ref ="teacher2" /> </util:map > </beans >
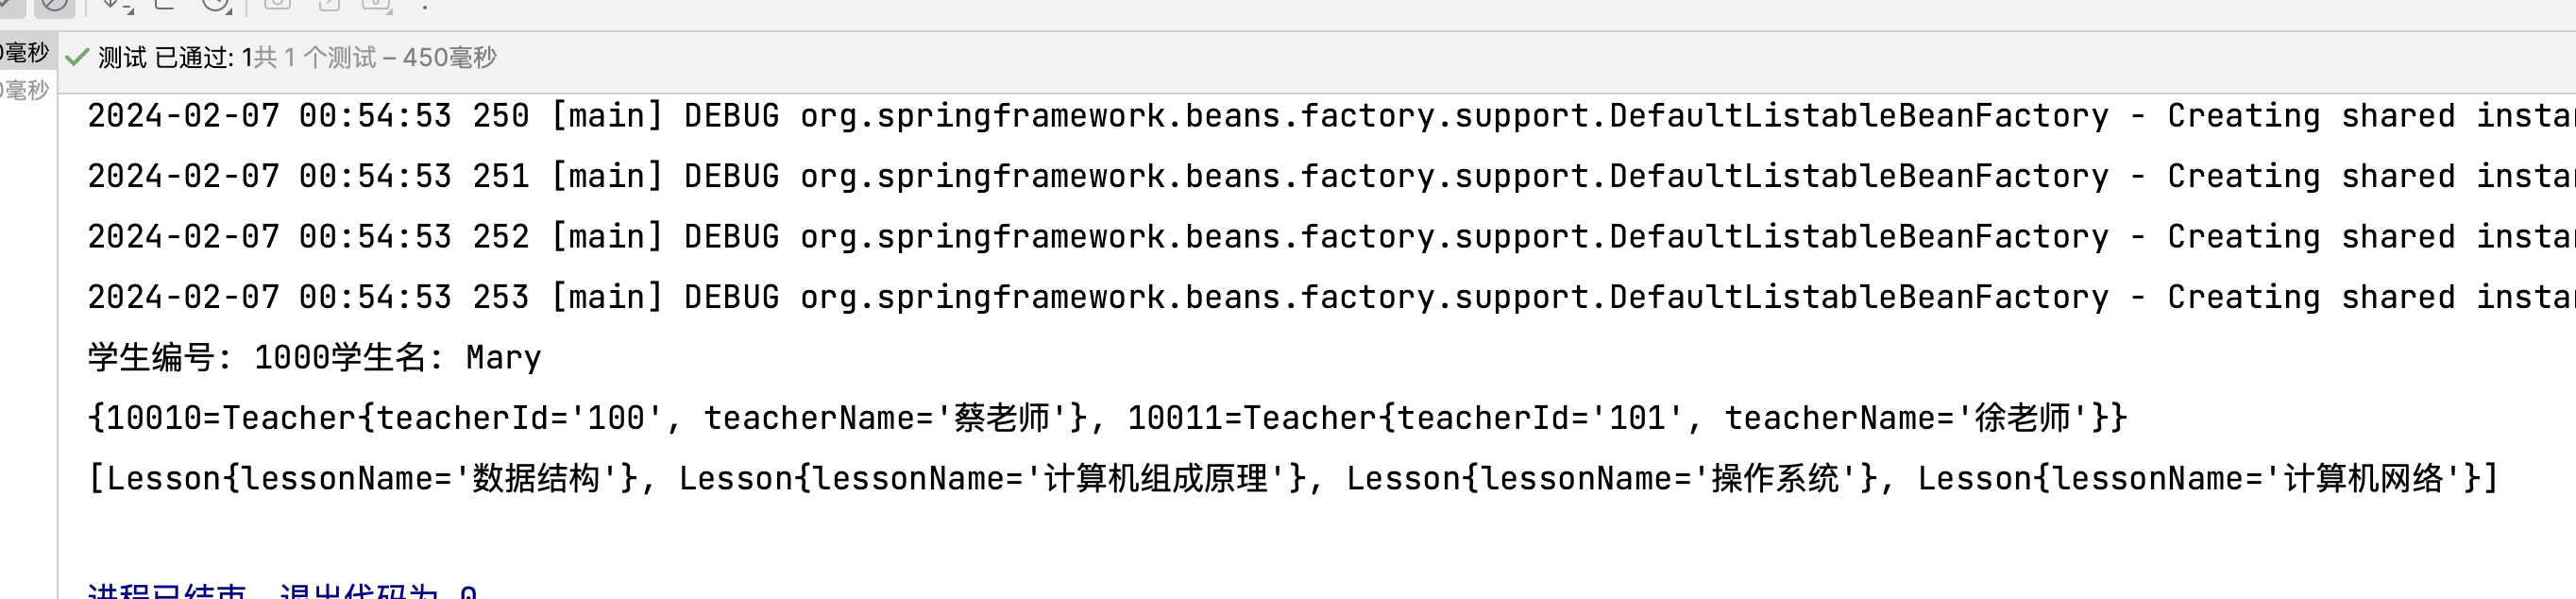
输出结果
p命名空间注入 bean-di-ref.xml中简单修改,添加如下约束以及标签
xmlns:p="http://www.springframework.org/schema/p"
1 2 3 4 <bean class ="org.example.spring6.iocxml.dimap.Student" id ="studentP" p:studentId ="1000" p:studentName ="Mary" p:lessonList-ref ="lessonList" p:teacherMap-ref ="teacherMap" > </bean >
编写测试用例
1 2 3 4 5 6 @Test public void testPLabel () {ApplicationContext context = new ClassPathXmlApplicationContext ("bean-di-ref.xml" );Student student = context.getBean("studentP" , Student.class);
引入外部属性文件 导入连接MySQL相关依赖在pom.xml中
1 2 3 4 5 6 7 8 9 10 11 <dependency > <groupId > mysql</groupId > <artifactId > mysql-connector-java</artifactId > <version > 8.0.30</version > </dependency > <dependency > <groupId > com.alibaba</groupId > <artifactId > druid</artifactId > <version > 1.0.31</version > </dependency >
连接MySQL操作,写入配置文件jdbc.properties,配置MySQL相关
1 2 3 4 jdbc.user =root jdbc.password =11111111 jdbc.url =jdbc:mysql://localhost:3306/ssm?serverTimezone=UTC jdbc.driver =com.mysql.cj.jdbc.Driver
然后配置配置bean,bean-jdbc.xml
1 2 3 4 5 6 7 8 9 10 11 12 13 14 15 16 17 18 19 <?xml version="1.0" encoding="UTF-8" ?> <beans xmlns ="http://www.springframework.org/schema/beans" xmlns:xsi ="http://www.w3.org/2001/XMLSchema-instance" xmlns:context ="http://www.springframework.org/schema/context" xsi:schemaLocation ="http://www.springframework.org/schema/beans http://www.springframework.org/schema/beans/spring-beans.xsd http://www.springframework.org/schema/context http://www.springframework.org/schema/context/spring-context.xsd" ><context:property-placeholder location ="classpath:jdbc.properties" /> <bean id ="druidDataSource" class ="com.alibaba.druid.pool.DruidDataSource" > <property name ="url" value ="${jdbc.url}" /> <property name ="username" value ="${jdbc.user}" /> <property name ="password" value ="${jdbc.password}" /> <property name ="driverClassName" value ="${jdbc.driver}" /> </bean > </beans >
这里的属性值会读取到jdbc.properties文件中的值
编写测试用例
1 2 3 4 5 6 @Test public void testJdbc2 () {ApplicationContext context = new ClassPathXmlApplicationContext ("bean-jdbc.xml" );DruidDataSource druidDataSource = context.getBean(DruidDataSource.class);
bean的作用域 在Spring中,可以通过配置bean标签的scope属性来执行bean的作用范围,各取值含义如下表:
取值
含义
创建对象的时机
singleton(默认)
在IoC容器中,这个bean的对象始终为单实例
IoC容器初始化时
prototype
这个bean在IoC容器中有多个实例
获取bean时
新建Order类
1 2 3 4 5 6 7 8 9 10 11 12 package org.example.spring6.iocxml.scope;public class Orders {
配置bean,bean-scope.xml
1 2 3 4 5 6 7 8 9 <?xml version="1.0" encoding="UTF-8" ?> <beans xmlns ="http://www.springframework.org/schema/beans" xmlns:xsi ="http://www.w3.org/2001/XMLSchema-instance" xsi:schemaLocation ="http://www.springframework.org/schema/beans http://www.springframework.org/schema/beans/spring-beans.xsd" > <bean class ="org.example.spring6.iocxml.scope.Orders" id ="orders" scope ="singleton" > </bean > </beans >
其中bean标签中的scope属性默认为singleton
新建测试类
1 2 3 4 5 6 7 8 @Test public void testOrders () {ApplicationContext context = new ClassPathXmlApplicationContext ("bean-scope.xml" );Orders orders = context.getBean("orders" , Orders.class);Orders orders1 = context.getBean("orders" , Orders.class);
这里新建两个对象,都取自同一个bean,输出对象的地址,查看是否相同
可以看到两个实例的地址是相同的
测试多实例,将bean标签中的scope属性改为prototype
1 2 3 4 5 6 7 8 9 <?xml version="1.0" encoding="UTF-8" ?> <beans xmlns ="http://www.springframework.org/schema/beans" xmlns:xsi ="http://www.w3.org/2001/XMLSchema-instance" xsi:schemaLocation ="http://www.springframework.org/schema/beans http://www.springframework.org/schema/beans/spring-beans.xsd" > <bean class ="org.example.spring6.iocxml.scope.Orders" id ="orders" scope ="prototype" > </bean > </beans >
bean的生命周期
bean对象的创建(调用无参构造)
给bean对象设置相关属性
bean后置处理器(初始化之前)
bean对象初始化(调用制定初始化方法)
bean后置处理器(初始化之后)
bean对象创建完成,可以使用
bean对象销毁(配置制定销毁方法)
关闭IoC容器
新建User类
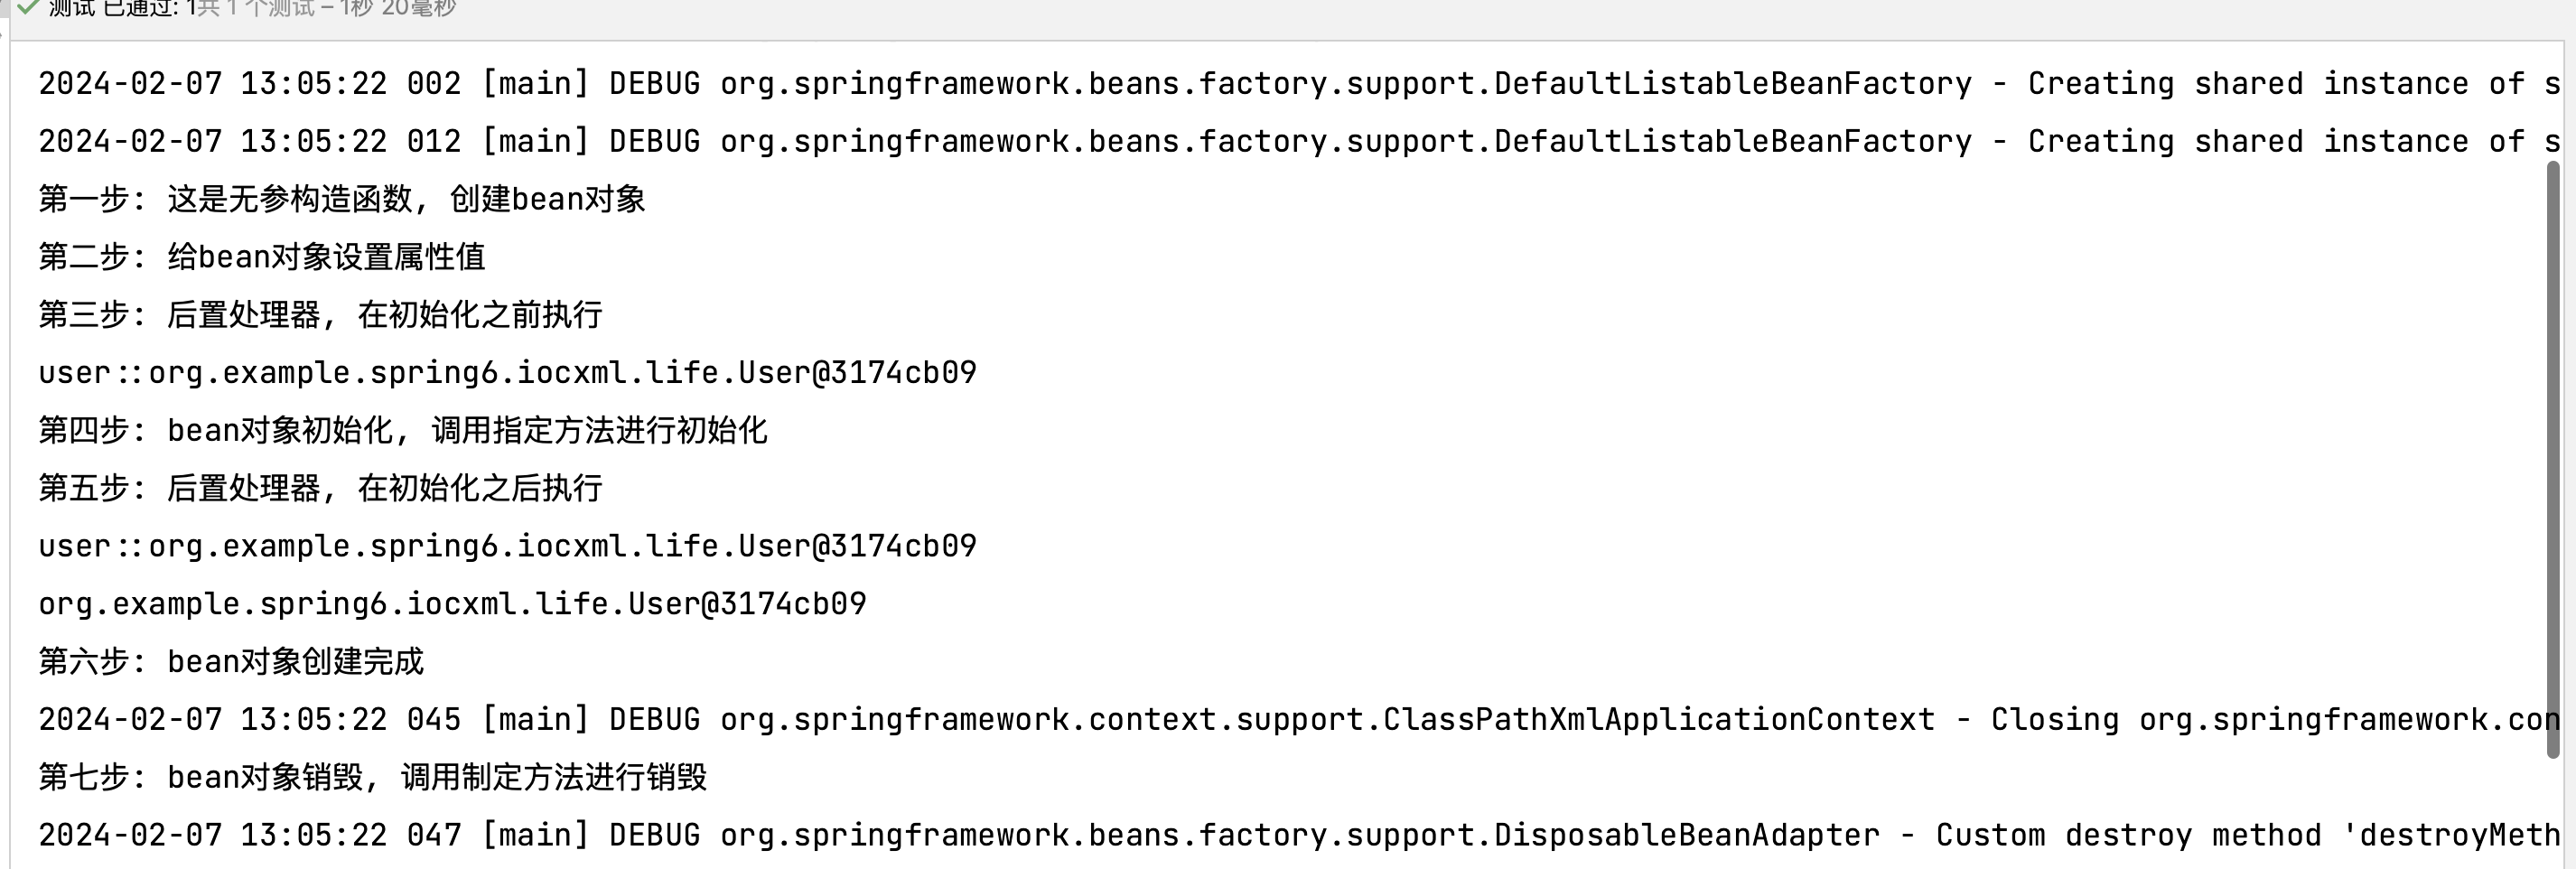
1 2 3 4 5 6 7 8 9 10 11 12 13 14 15 16 17 18 19 20 21 22 23 24 25 26 27 28 29 30 31 32 33 34 35 36 37 package org.example.spring6.iocxml.life;public class User {private String name;public User () {"第一步: 这是无参构造函数, 创建bean对象" );public String getName () {return name;public void setName (String name) {this .name = name;"第二步: 给bean对象设置属性值" );public void initMethod () {"第四步: bean对象初始化, 调用指定方法进行初始化" );public void destroyMethod () {"第七步: bean对象销毁, 调用制定方法进行销毁" );
用于实现bean的初始化和销毁方法,initMethod()和destroyMethod()
构造bean,bean-life.xml
1 2 3 4 5 6 7 8 9 <?xml version="1.0" encoding="UTF-8" ?> <beans xmlns ="http://www.springframework.org/schema/beans" xmlns:xsi ="http://www.w3.org/2001/XMLSchema-instance" xsi:schemaLocation ="http://www.springframework.org/schema/beans http://www.springframework.org/schema/beans/spring-beans.xsd" > <bean class ="org.example.spring6.iocxml.life.User" id ="user" init-method ="initMethod" destroy-method ="destroyMethod" > <property name ="name" value ="Lucy" /> </bean > </beans >
在bean标签中添加两个属性init-method和destroy-method,属性值为两个函数名
编写测试类
1 2 3 4 5 6 7 8 @Test public void testLife () {ClassPathXmlApplicationContext context = new ClassPathXmlApplicationContext ("bean-life.xml" );User user = context.getBean("user" , org.example.spring6.iocxml.life.User.class);"第六步: bean对象创建完成" );
为了区分其他包里面的User类,这里写了包的全路径

这里并没有给出第三步与第五步,现在写入后置处理器
新建类MyBeanPost依赖于接口BeanPostProcessor
1 2 3 4 5 6 7 8 9 10 11 12 13 14 15 16 17 18 19 20 21 22 23 24 25 26 27 28 package org.example.spring6.iocxml.life;import org.springframework.beans.BeansException;import org.springframework.beans.factory.config.BeanPostProcessor;public class MyBeanPost implements BeanPostProcessor {@Override public Object postProcessBeforeInitialization (Object bean, String beanName) throws BeansException {"第三步: 后置处理器, 在初始化之前执行" );"::" + bean);return bean;@Override public Object postProcessAfterInitialization (Object bean, String beanName) throws BeansException {"第五步: 后置处理器, 在初始化之后执行" );"::" + bean);return bean;
在bean-life.xml中新增后置处理器的配置
1 2 3 4 <bean class ="org.example.spring6.iocxml.life.MyBeanPost" id ="myBeanPost" > </bean >
测试类运行结果
FactoryBean工厂bean 新建User1类,无任何属性
1 2 3 4 5 6 7 8 9 10 11 12 package org.example.spring6.iocxml.factoryBean;public class User1 {
配置bean,bean-factorybean.xml
1 2 3 4 5 6 7 8 <?xml version="1.0" encoding="UTF-8" ?> <beans xmlns ="http://www.springframework.org/schema/beans" xmlns:xsi ="http://www.w3.org/2001/XMLSchema-instance" xsi:schemaLocation ="http://www.springframework.org/schema/beans http://www.springframework.org/schema/beans/spring-beans.xsd" > <bean class ="org.example.spring6.iocxml.factoryBean.MyFactoryBean" id ="user1" > </bean > </beans >
实现FactoryBean接口
1 2 3 4 5 6 7 8 9 10 11 12 13 14 15 16 17 18 19 20 21 22 23 package org.example.spring6.iocxml.factoryBean;import org.springframework.beans.factory.FactoryBean;public class MyFactoryBean implements FactoryBean <User1> {@Override public User1 getObject () throws Exception {return new User1 ();@Override public Class<?> getObjectType() {return User1.class;
新建测试类
1 2 3 4 5 6 @Test public void testFactoryBean () {ApplicationContext context = new ClassPathXmlApplicationContext ("bean-factorybean.xml" );User1 user1 = context.getBean("user1" , User1.class);
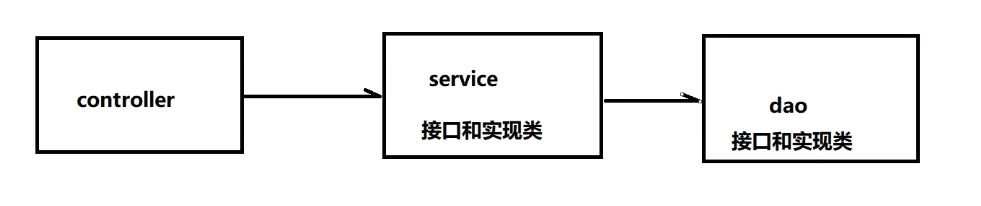
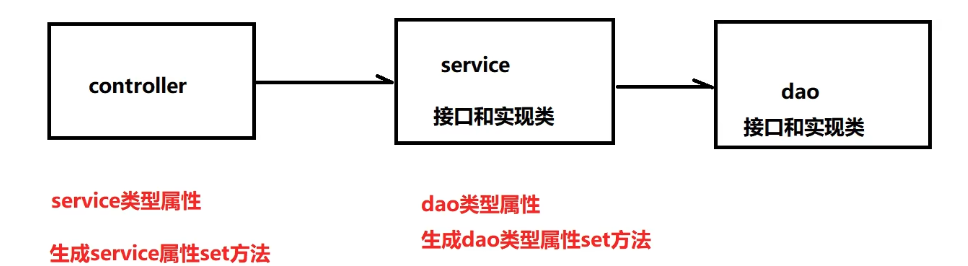
基于XML的自动装配 根据制定的策略,在IoC容器中匹配某一个bean,自动为指定的bean中所依赖的类类型或接口类型属性值复制
若不使用Spring的写法
DAO层
1 2 3 4 5 6 package org.example.spring6.iocxml.auto.dao;public interface UserDao {public void addUserDao () ;
1 2 3 4 5 6 7 8 9 10 11 12 13 14 15 16 17 package org.example.spring6.iocxml.auto.dao.impl;import org.example.spring6.iocxml.auto.dao.UserDao;public class UserDaoImpl implements UserDao {@Override public void addUserDao () {"执行了UserDao方法" );
Service层
1 2 3 4 5 6 package org.example.spring6.iocxml.auto.service;public interface UserService {public void addUserService () ;
1 2 3 4 5 6 7 8 9 10 11 12 13 14 15 16 17 18 19 20 21 22 package org.example.spring6.iocxml.auto.service.impl;import org.example.spring6.iocxml.auto.dao.UserDao;import org.example.spring6.iocxml.auto.dao.impl.UserDaoImpl;import org.example.spring6.iocxml.auto.service.UserService;public class UserServiceImpl implements UserService {@Override public void addUserService () {"UserService()方法执行" );UserDao userDao = new UserDaoImpl ();
Controller层
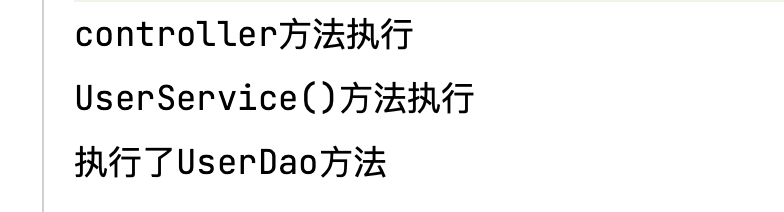
1 2 3 4 5 6 7 8 9 10 11 12 13 14 15 16 17 18 19 package org.example.spring6.iocxml.auto.controller;import org.example.spring6.iocxml.auto.service.UserService;import org.example.spring6.iocxml.auto.service.impl.UserServiceImpl;public class UserController {public void addUser () {"controller方法执行" );UserService userService = new UserServiceImpl ();
新建简单测试类
1 2 3 4 5 @Test public void testController () {UserController controller = new UserController ();
配置bean,完成自动装配
Controller层
1 2 3 4 5 6 7 8 9 10 11 12 13 14 15 16 17 18 19 20 21 22 23 24 25 26 27 28 29 30 package org.example.spring6.iocxml.auto.controller;import org.example.spring6.iocxml.auto.service.UserService;import org.example.spring6.iocxml.auto.service.impl.UserServiceImpl;public class UserController {private UserService userService;public UserService getUserService () {return userService;public void setUserService (UserService userService) {this .userService = userService;public void addUser () {"controller方法执行" );
Service层
1 2 3 4 5 6 7 8 9 10 11 12 13 14 15 16 17 18 19 20 21 22 23 24 25 26 27 28 29 30 31 package org.example.spring6.iocxml.auto.service.impl;import org.example.spring6.iocxml.auto.dao.UserDao;import org.example.spring6.iocxml.auto.dao.impl.UserDaoImpl;import org.example.spring6.iocxml.auto.service.UserService;public class UserServiceImpl implements UserService {private UserDao userDao;public UserDao getUserDao () {return userDao;public void setUserDao (UserDao userDao) {this .userDao = userDao;@Override public void addUserService () {"UserService()方法执行" );
配置bean,bean-auto.xml
1 2 3 4 5 6 7 8 9 10 11 12 13 14 15 16 <?xml version="1.0" encoding="UTF-8" ?> <beans xmlns ="http://www.springframework.org/schema/beans" xmlns:xsi ="http://www.w3.org/2001/XMLSchema-instance" xsi:schemaLocation ="http://www.springframework.org/schema/beans http://www.springframework.org/schema/beans/spring-beans.xsd" > <bean class ="org.example.spring6.iocxml.auto.controller.UserController" id ="userController" autowire ="byType" > </bean > <bean class ="org.example.spring6.iocxml.auto.service.impl.UserServiceImpl" id ="userService" autowire ="byType" > </bean > <bean class ="org.example.spring6.iocxml.auto.dao.impl.UserDaoImpl" id ="userDao" > </bean > </beans >
其中autowire属性是自动装填属性,属性值byType是根据类型自动装配,根据类型装配会自动匹配相应的类型,而根据名称匹配需要保证待匹配bean的名称与声明时相同。
新建测试类
1
2
3
4
5
6
@Test public void testAuto () {ApplicationContext context = new ClassPathXmlApplicationContext ("bean-auto.xml" );UserController userController = context.getBean("userController" , UserController.class);
byType:根据类型匹配IoC容器中的某个兼容类型的bean,为属性自动赋值
若在IoC中,没有任何一个兼容类型的bean能够为属性赋值,则该属性不装配,即默认值为null
若在IoC中,有多个兼容类型的bean能够为属性赋值,则抛出异常NoUniqueBeanDefinitionException